DIY Bread Scoring Tool: Make Your Own at Home
You don’t need to spend a lot of money on a fancy sourdough lame. You can make a simple, working bread scoring tool right at home. It takes just a few minutes and a handful of cheap materials.
This guide shows you exactly how to do it. You’ll also learn how to use it the right way to get clean, beautiful scores on your bread.
What Is a Bread Scoring Tool?
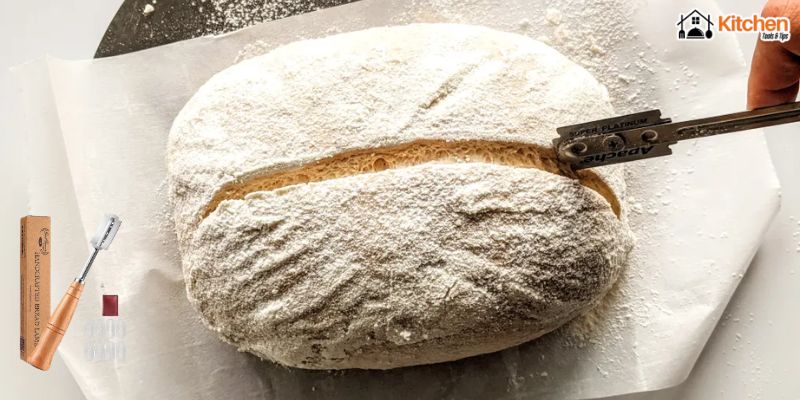
A bread scoring tool is used to cut the surface of bread dough before baking. Bakers call this process “scoring.” The cuts you make let the bread expand in the oven the right way.
Without scoring, the bread may burst at weak spots. The crust can crack in ugly, random places. Scoring gives the baker full control over how the bread opens up.
The most common tool is called a sourdough lame (pronounced “lahm”). It holds a thin bread razor blade. The blade slices through the dough with very little drag.
Professional bread bakers use lames every day. But you can make one yourself with everyday items.
Why Scoring Matters in Baking
Scoring is not just about looks. It plays a big role in how bread bakes.
When you place dough in a hot oven, gases inside expand fast. The dough needs a place to release that pressure. A score gives it that exit path.
Here is what good scoring does:
- Controls the direction of the rise
- Helps the crust form properly
- Creates an “ear,” which is that raised flap of crust bakers love
- Improves the crumb structure inside
- Gives artisan bread its classic look
Both beginner bakers and expert bread bakers agree — scoring makes a huge difference. Even a simple score with a sharp blade can take your loaf from flat to stunning.
What You Need to Make a DIY Scoring Tool
You only need a few items. Most of these are already in your home or easy to find at a hardware or craft store.
Materials:
- A wooden chopstick, wooden dowel, or thick pencil
- Single-edge razor blades (the kind used in box cutters or art knives)
- Electrical tape or strong adhesive tape
- Strong glue (optional, for extra hold)
- Rubber band (optional)
That’s it. No special equipment. No expensive parts. Just basic supplies.
You can also use a craft knife or a small wooden skewer if you want a lighter grip. The goal is to hold a sharp bread razor blade at a slight angle so it cuts through dough cleanly.
Step-by-Step: How to Make Your Own Bread Lame
Follow these steps carefully. Take your time. The goal is to make a safe and sturdy tool.
Step 1: Choose Your Handle
Pick a wooden chopstick or dowel about 20–25 cm long. It should feel comfortable in your hand. Make sure it is dry and clean.
Step 2: Position the Blade
Hold the razor blade at the top end of the stick. Angle it slightly — about 30 to 45 degrees. This curve helps you score bread dough with a smooth, gliding motion.
Some bread bakers use a rubber band to hold the blade in place first. This helps you check the angle before securing it.
Step 3: Secure the Blade
Wrap electrical tape tightly around the base of the blade and the stick. Go around several times. The blade should not move at all.
You can add a small drop of strong glue under the blade before taping. Let it dry fully before using the tool.
Step 4: Check the Hold
Give the blade a gentle tug. It should feel solid. If it shifts at all, add more tape. Safety comes first.
Step 5: Test on Paper
Before using your DIY scoring lame on real dough, test it on a piece of paper. Draw a slow, steady line. The blade should glide without pulling or tearing.
If it drags, the angle may be too flat. Adjust and re-tape if needed.
Your DIY bread scoring tool is now ready to use.
How to Score Sourdough Bread with Your DIY Tool
Scoring sourdough bread takes practice. But with a sharp blade and the right technique, you’ll get great results fast.
Before You Score:
- Make sure your dough is cold. Score sourdough straight from the fridge. Cold dough holds its shape better.
- Dust the surface lightly with flour or rice flour.
- Have your scoring pattern ready in your mind before you start.
How to Make the Cut:
Hold your DIY lame at a low angle — about 30 to 45 degrees to the surface of the dough. This helps create an ear.
Use one quick, confident stroke. Do not saw back and forth. One clean move works best.
For a basic oval loaf, make one long slash down the center. For a round loaf (called a boule), you can try a square, leaf, or cross pattern.
Common Scoring Patterns:
- Single slash — simple and clean
- Double slash — good for batards
- Crosshatch — classic artisan bread style
- Leaf or wheat design — decorative and impressive
Practice on each loaf. Every score will teach you something new.
Tips for Better Scoring Results
Even with a great DIY bread scoring tool, small details matter. These tips help you get cleaner, deeper scores every time.
Keep the blade sharp. A dull blade drags and deflates the dough. Replace your razor blade often. Sharp blades are safer and more effective.
Work fast. Don’t hover over the dough. Commit to the cut and move quickly.
Use a wet blade for sticky dough. Dip the blade lightly in water before cutting. This reduces drag on high-hydration sourdough.
Score deep enough. Shallow cuts close up in the oven. Aim for about 1–1.5 cm deep.
Chill the dough well. Cold dough scores much cleaner than warm dough. Always score sourdough bread straight from the refrigerator.
Use good lighting. You need to see what you are doing. Good light helps you place cuts with precision.
Safety Tips When Using a Bread Razor Blade
A bread razor blade is extremely sharp. Handle it with care at all times.
- Never leave a loose blade on the counter
- Always point the blade away from your fingers
- Store your DIY tool in a small container or wrap the blade end in thick tape when not in use
- Keep the tool away from children
- Dispose of used blades safely — wrap them in tape or place them in a blade disposal container
If your blade becomes dull, do not try to sharpen it. Simply replace it. A dull blade is actually more dangerous because you need more pressure, which can cause slips.
When to Replace Your DIY Tool
Your DIY bread scoring tool will not last forever. Here are signs it is time to make a new one or update the blade.
- The blade feels dull or drags on paper
- The tape starts to loosen or unravel
- The blade shifts even slightly when you press it
- You notice tearing instead of clean cuts on your bread dough
Replacing the blade is easy. Just remove the old tape, peel off the used blade carefully, and attach a new one. Your handle can last a long time if you keep it dry and clean.
Many bread bakers keep a small stash of extra razor blades so they are always ready.
FAQ
Q: Can I use a regular knife instead of a scoring lame? Yes, but it is not ideal. A sharp paring knife or craft knife can work in a pinch. However, a blade held at an angle gives you much cleaner cuts with less drag.
Q: What kind of razor blade should I use? Use a standard single-edge razor blade. These are widely available at hardware and craft stores. They are the same type used in art knives and box cutters.
Q: Do I need to score all types of bread? Not always. Scoring is most important for sourdough and artisan bread with a hard crust. Soft sandwich loaves baked in a pan usually do not need scoring.
Q: How deep should I score bread dough? Aim for about 1 to 1.5 cm deep. Too shallow and the cut will close up. Too deep and the dough may collapse.
Q: Can I use my DIY tool more than once? Yes. The handle is reusable. Just replace the blade when it gets dull or after a few uses for best results.
Q: Is a curved blade better than a straight one? A curved blade helps create a better ear, especially on oval loaves. A straight blade works well for decorative patterns on round boules.
Q: How do I clean my DIY scoring tool? Wipe the blade gently with a dry cloth after each use. Do not soak it in water. Keep the handle dry to prevent cracking or warping.