How to Clean a Dough Whisk: Simple Steps for a Spotless Tool
Your Danish dough whisk sits on the counter, covered in sticky bread dough. You just finished mixing sourdough bread, and now you wonder how to clean this tool. Many bakers face this problem. The good news? Cleaning a dough whisk is easy when you know the right steps.
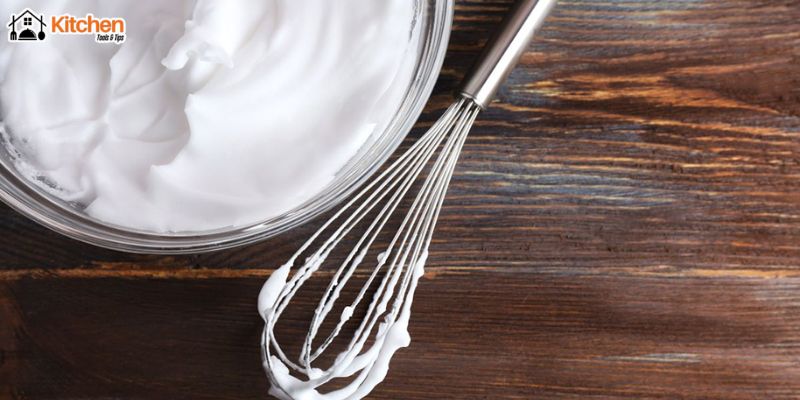
A dough whisk is a simple tool. It has thick wire loops and a wooden handle. This Danish whisk makes bread mixing fast and easy. But the same loops that mix dough so well can trap flour and sticky bits. Clean it right away, and you’ll keep it working for years.
This guide shows you how to clean a dough whisk the right way. You’ll learn quick methods and deep cleaning tricks. No fancy tools needed. Just water, soap, and a few minutes of your time.
What Makes a Dough Whisk Different
A Danish bread whisk is not like other tools. It has a unique design. The stainless steel wires form loops that cut through thick dough. A bread mixer or dough mixer uses motors and bowls. A dough hook attaches to a stand mixer. But a Dutch whisk is all manual.
The wooden handle feels good in your hand. The wire loops reach deep into bowls. This makes bread mixing smooth and simple. But these same loops catch dough and flour. The wooden handle can soak up water if you’re not careful.
When you mix sourdough bread or make Danish pastry, bits of dough stick between the wires. Flour builds up in the curves. This is normal. The key is cleaning your sourdough whisk before things dry and harden.
Clean Your Dough Whisk Right After Use
The best time to clean a dough whisk is right now. Don’t wait. Fresh dough wipes away fast. Dried dough turns into cement.
Here’s what to do:
Step 1: Hold the whisk under warm running water. Let the water flow through the wire loops. Most fresh bread dough will wash away in seconds.
Step 2: Use your fingers to rub the wires gently. Feel for sticky spots. Remove any chunks of dough.
Step 3: Keep the wooden handle away from too much water. Wood can crack or split if it soaks too long.
Step 4: Shake off extra water. You’re done if the whisk looks clean.
This quick rinse works great after mixing most bread dough. It takes less than a minute. Your Danish whisk is ready for next time.
Deep Cleaning Your Dough Whisk
Sometimes dough dries on your whisk. Maybe you forgot to clean it. Or you mixed something extra sticky. Don’t worry. A deep clean will fix it.
What you need:
- Warm water
- Dish soap
- A small brush or old toothbrush
- A towel
How to do it:
Fill your sink with warm water. Add a few drops of dish soap. The water should feel hot but not burning.
Put your dough whisk in the soapy water. Let it soak for 5 to 10 minutes. This softens dried flour and dough bits.
Take the whisk out. Use a small brush to scrub the wire loops. Get into every curve and corner. The brush reaches spots your fingers can’t.
Pay attention to where the wires meet. Dough loves to hide there. Scrub gently but firmly.
For really stuck bits, make a paste. Mix baking soda with a little water. Rub this paste on the problem spots. Let it sit for 2 minutes. Then scrub again. The paste breaks down dried dough.
Rinse the whisk under warm running water. Make sure all soap is gone. Soap residue can affect your next batch of bread dough.
Check the wooden handle. If it got wet, dry it right away. Use a clean towel. Don’t let water sit on wood.
Natural Cleaning Tricks
You don’t need harsh chemicals to clean a dough whisk. Natural methods work great.
White vinegar method: Mix equal parts water and white vinegar. Soak the stainless steel wires for 5 minutes. Vinegar cuts through sticky residue. It also makes metal shine. Just keep vinegar away from the wooden handle.
Lemon juice trick: Squeeze fresh lemon on dried dough spots. The acid breaks down the sticky mess. Wait 3 minutes. Then scrub and rinse.
Hot water power: Sometimes hot water alone does the job. Boil water in a kettle. Pour it over the wire loops (not the handle). The heat melts sticky bits. Use this method only on the metal parts.
These natural tricks work well for sourdough whisk cleaning. They’re safe and cheap. Plus, they won’t leave chemical smells on your tool.
Drying Your Dough Whisk Properly
Drying is as important as washing. A wet whisk can rust or grow mold. Here’s how to dry it right.
Shake the whisk hard over the sink. Get rid of most water drops. Then grab a clean kitchen towel.
Dry the stainless steel wires first. Rub each loop with the towel. Make sure no water hides in the curves.
The wooden handle needs extra care. Pat it dry completely. Wood that stays wet can crack or warp. It might also grow mold spots.
Some bakers use a hair dryer on low heat. This works well for the handle. Just keep the dryer moving. Don’t blast one spot too long.
Let the whisk air dry for 30 minutes before you put it away. Stand it upright in a jar or hang it on a hook. Air should flow around all parts.
Never put a damp dough whisk in a drawer. Trapped moisture causes problems. Your Danish bread whisk will last longer when stored dry.
Storing Your Clean Dough Whisk
A clean, dry whisk needs a good home. Store it where air can reach it.
Hang it on a hook or rail. This keeps the wires separate from other tools. The wooden handle won’t get dinged or scratched.
Or stand it in a large jar or crock. This works great on counters. You can see the whisk and grab it fast.
Keep your dough whisk away from heat sources. Don’t store it near the stove or oven. Heat can damage the wooden handle over time.
If you must use a drawer, pick a spot where the whisk won’t get crushed. Put it near the front for easy access.
Good storage protects your investment. A well-cared-for Danish whisk lasts for many years. You’ll mix countless batches of bread dough with the same tool.
Comparing to Other Bread Mixing Tools
A bread mixer or dough mixer needs different care. These electric tools have motors and many parts. You can’t soak them in water.
A dough hook attaches to a stand mixer. It’s usually stainless steel. Most dough hooks go in the dishwasher. But you still need to check for dried dough in crevices.
Your Dutch whisk is simpler. No cords. No motors. No complicated parts. This makes cleaning easier. It also means less can go wrong.
Some bakers use both tools. They might use a dough mixer for large batches. But they reach for the dough whisk for quick jobs or small amounts. Each tool has its place.
The sourdough whisk wins on ease of cleaning. A quick rinse, and you’re done. No disassembly required. This is why many home bakers love this simple tool.
Tips to Keep Your Whisk in Top Shape
Clean your dough whisk after every use. This one habit prevents most problems.
Don’t use metal scrubbers on the wires. They can scratch stainless steel. Stick to soft brushes or sponges.
Oil the wooden handle once a month. Use food-safe mineral oil. This keeps wood from drying and cracking. Just rub a thin coat on the handle. Let it soak in overnight.
Check the wires regularly. Look for bends or breaks. A damaged whisk won’t mix dough well. Most quality whisks last for years, but accidents happen.
Never put your dough whisk in the dishwasher. The harsh detergent hurts the wooden handle. The heat can warp the wood. Hand washing is always better.
If flour builds up over time, soak the whisk monthly. Use warm soapy water. This deep clean prevents stubborn residue.
When to Replace Your Dough Whisk
A good Danish dough whisk lasts for years. But nothing lasts forever.
Replace your whisk if the wires break or bend badly. Damaged wires won’t mix bread dough properly. They might even poke you.
Check the wooden handle for deep cracks. Small wear is normal. But big cracks mean the handle might break during mixing.
If rust appears on the stainless steel and won’t come off, it’s time for a new whisk. Some surface rust can be scrubbed away. But deep rust is a problem.
Most bakers replace a dough whisk every 5 to 10 years. With good care, yours might last even longer.
Making Cleaning a Habit
The secret to a clean dough whisk is routine. Build these steps into your baking process.
Mix your sourdough bread or Danish pastry. As soon as you finish, rinse the whisk. Don’t wait until later.
Keep your sink clear while baking. This makes quick rinsing easy. You’re more likely to clean right away when the sink is ready.
Set up a drying spot near your baking area. A small towel or drying rack works great. This reminds you to dry the whisk properly.
These small habits add up. Your Danish bread whisk stays clean. You spend less time scrubbing. And your tool lasts longer.
Frequently Asked Questions
Can I put my dough whisk in the dishwasher?
No. The dishwasher damages the wooden handle. Always hand wash your dough whisk with warm water and soap.
How do I remove dried dough from the wires?
Soak the whisk in warm soapy water for 10 minutes. Then use a small brush to scrub the wires. Baking soda paste helps with stubborn spots.
Why does my wooden handle look dry?
Wood dries out over time. Rub food-safe mineral oil on the handle once a month. This keeps it smooth and prevents cracks.
Is my dough whisk supposed to rust?
No. Good quality stainless steel should not rust. Dry your whisk completely after each wash. Store it in a dry place.
How often should I deep clean my dough whisk?
Deep clean once a month if you bake often. For light use, every few months is fine. Always rinse after each use.
Can I use my dough whisk for other foods?
Yes. A Danish whisk works for pancake batter, cookie dough, and more. Just clean it well between different foods.
A clean dough whisk is a happy whisk. You now know every trick to keep your Danish dough whisk in perfect shape. Quick rinses after use save time. Deep cleaning methods handle tough jobs. Proper drying and storage protect your investment.
This simple tool makes bread mixing a joy. With good care, your sourdough whisk will serve you for many years. You’ll mix countless batches of bread dough with confidence.
Start today. Clean your dough whisk right after your next baking session. Build the habit. Your future self will thank you. And your Danish bread whisk will stay ready for whatever you want to mix next.
Happy baking!