Complete Guide: How to Use a Flour Sifter Correctly
Have you ever wondered why your cakes turn out dense? The answer might be in how you handle your flour. A flour sifter is a simple tool that makes a big difference in baking.
I’ve been baking for over 15 years. I learned the hard way that sifting matters. My first batch of cookies was hard as rocks. Then I started sifting my flour properly. Everything changed.
In this guide, you’ll learn exactly how to use a handheld sifter. You’ll discover why this step matters. And you’ll avoid the mistakes I made.
Let’s dive in.
What Is a Flour Sifter?
A flour sifter is a kitchen tool with a mesh screen. It breaks up clumps in dry ingredients. The mesh filters out lumps and adds air to your flour.
Most sifters are made of stainless steel. They last longer and don’t rust. Some are plastic, but metal works better.
There are two main types:
Hand-crank sifters: You turn a handle to push flour through the mesh.
Squeeze-handle sifters: You squeeze the handle to move the flour.
Both work well. I prefer the squeeze type. It’s faster and easier on my hands.
Why Sifting Flour Matters
Sifting isn’t just an extra step. It serves real purposes.
Removes Lumps
Flour naturally clumps during storage. These lumps don’t break down easily when you mix. They create dense spots in your baked goods.
A baking sifter catches these lumps. You get smooth, clean flour.
Adds Air
When flour sits in a bag, it compacts. Sifting adds air between the particles. This makes your flour lighter.
Light flour creates fluffy cakes and tender cookies. Dense flour creates heavy, tough results.
Mixes Dry Ingredients
Sifting combines ingredients evenly. When you sift cake flour with baking powder, they blend perfectly. No more pockets of leavening agent in your batter.
Ensures Accurate Measuring
Sifted flour measures differently than packed flour. A cup of sifted flour weighs less. This affects your recipe ratios.
Most recipes tell you when to sift. If it says “1 cup flour, sifted,” you measure first, then sift. If it says “1 cup sifted flour,” you sift first, then measure.
Types of Flour Sifters
Let’s look at the common types.
Handheld Sifter with Crank
This classic design has a hand crank on the side. You turn it to move the blades inside. The blades push flour through the mesh.
Pros:
- Steady, controlled sifting
- Good for large batches
- Durable construction
Cons:
- Requires two hands
- Slower than squeeze types
Squeeze-Handle Sifter
This type has a handle you squeeze. Each squeeze moves flour through the mesh.
Pros:
- One-handed operation
- Fast sifting
- Easy to use
Cons:
- Can tire your hand
- May not last as long
Cup-Style Sifter
This looks like a measuring cup with a mesh bottom. You press a trigger to sift.
Pros:
- Measures and sifts at once
- Compact design
- Easy storage
Cons:
- Harder to clean
- Limited capacity
I own all three types. For everyday baking, I grab my squeeze-handle sifter. For big projects, I use the hand-crank version.
How to Use a Flour Sifter: Step-by-Step Guide
Here’s the proper way to sift flour.
Step 1: Gather Your Tools
You need:
- Your sifter
- A large bowl
- Measuring cups
- The flour or dry ingredients
Place the bowl on your counter. Make sure it’s big enough to catch all the flour.
Step 2: Add Flour to the Sifter
Spoon flour into the top of your sifter. Don’t pack it down. Fill it about three-quarters full.
Overfilling makes sifting harder. The flour gets stuck and won’t flow smoothly.
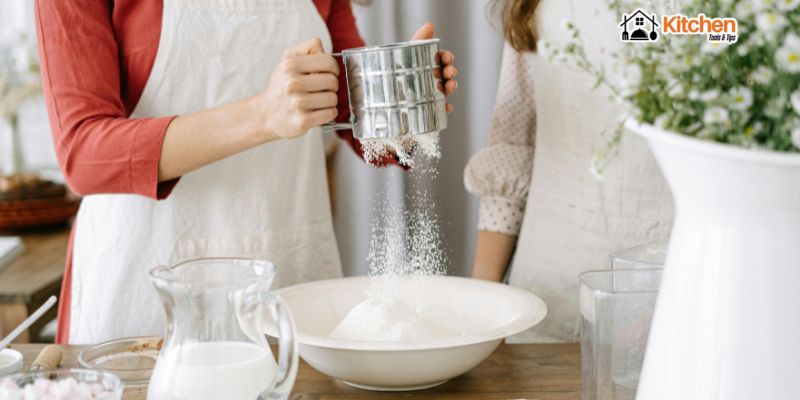
Step 3: Position the Sifter
Hold the sifter over your bowl. Keep it about 4 inches above the rim. This height lets air mix with the flour as it falls.
Step 4: Sift the Flour
For hand-crank sifters: Turn the handle steadily. Don’t rush. A smooth, even pace works best.
For squeeze-handle sifters: Squeeze and release in a steady rhythm. Keep the motion consistent.
The flour will fall through the mesh into your bowl. You’ll see it pile up light and fluffy.
Step 5: Repeat if Needed
Some recipes call for sifting twice or three times. This makes the flour extra light. It’s common for delicate cakes.
Just pour the sifted flour back into the sifter. Then sift again into the bowl.
Step 6: Check for Lumps
Look at the mesh after sifting. Any lumps or debris will be caught there. Tap them out into the trash.
If you see lots of lumps, your flour might be old. Fresh flour sifts more easily.
Measuring Flour Before vs. After Sifting
This confuses many bakers. The order matters.
“1 Cup Flour, Sifted”
This means:
- Measure 1 cup of flour first
- Then sift it
You end up with slightly less than 1 cup after sifting.
“1 Cup Sifted Flour”
This means:
- Sift the flour first
- Then measure 1 cup
You end up with exactly 1 cup of sifted flour.
The second method gives you less flour overall. Sifted flour is lighter and takes up more space.
Always follow what your recipe says. This small detail changes your results.
I learned this from a professional baker. My cakes used to come out dry. I was adding too much flour because I measured wrong.
Best Practices for Sifting Flour
Follow these tips for perfect results.
Use the Right Bowl Size
Pick a bowl twice as big as the flour amount. Flour puffs up when sifted. A small bowl causes spills.
Sift Onto Parchment Paper
Place parchment under your bowl. If flour spills, you can pour it back. Nothing goes to waste.
Don’t Tap the Sifter
Let the flour fall naturally. Tapping or shaking packs it down again. You lose the airiness you just created.
Sift Dry Ingredients Together
Combine best flour with baking powder, salt, and spices in the sifter. One pass mixes everything evenly.
This saves time. It also prevents streaks in your batter.
Keep Your Sifter Dry
Never wash a flour sifter with water. Flour and water make paste. This clogs the mesh.
Instead, tap out excess flour after each use. Use a dry brush for stuck bits.
Store It Properly
Keep your sifter in a dry place. Moisture causes rust on metal sifters. I store mine in a drawer with my other baking tools.
Common Mistakes to Avoid
Don’t make these errors.
Mistake 1: Skipping Sifting
Some bakers skip this step to save time. This creates lumpy batter and dense results.
Even pre-sifted flour needs sifting. It settles during shipping and storage.
Mistake 2: Overfilling the Sifter
A packed sifter jams. The flour won’t flow through the mesh. Fill it only three-quarters full.
Mistake 3: Using a Damaged Sifter
A bent mesh or broken handle makes sifting difficult. Check your sifter before use. Replace it if damaged.
I once used a sifter with a small hole in the mesh. Lumps slipped through. My cake had hard spots throughout.
Mistake 4: Sifting Too Fast
Rushing compacts the flour again. Use a steady, moderate pace. This keeps the flour light.
Mistake 5: Washing with Water
Water ruins sifters. The paste clogs the mesh permanently. Always clean dry.
If you must remove sticky substances, use a very small amount of water and dry immediately. But this rarely happens with just flour.
How to Sift Without a Sifter
Don’t have a sifter? Try these methods.
Use a Fine-Mesh Strainer
A kitchen strainer works like a sifter. Place it over a bowl. Add flour and tap the side gently.
The flour falls through the mesh. It takes longer but works well.
Use a Whisk
Put dry ingredients in a bowl. Whisk vigorously for 30 seconds. This breaks up lumps and adds air.
It’s not as effective as sifting. But it’s better than nothing.
Use a Fork
Run a fork through the flour repeatedly. This breaks up visible lumps.
Again, not ideal. But useful in a pinch.
I’ve used all these methods when traveling. They work for simple recipes. For delicate cakes, I always use a proper sifter.
Sifting Different Ingredients
Not just for flour.
Cake Flour
This is the finest flour type. It absolutely needs sifting. Cake flour clumps easily due to its fine texture.
Sift it at least twice for best results. Your cakes will be incredibly tender.
All-Purpose Flour
This benefits from sifting but doesn’t always require it. For cookies and quick breads, you can skip it.
For cakes and pastries, always sift.
Powdered Sugar
A powdered sugar sifter removes lumps beautifully. Powdered sugar gets hard clumps from moisture.
Sift it before adding to frosting. Your icing will be smooth and lump-free.
I always sift powdered sugar. Even fresh bags have lumps.
Cocoa Powder
Cocoa is notorious for clumps. Always sift it with your dry ingredients.
Unsifted cocoa creates brown specks in your batter. These become hard spots in the finished product.
Multiple Dry Ingredients
You can sift flour, baking powder, salt, and spices together. This distributes everything evenly.
Add the ingredients to the sifter in any order. They’ll mix as they pass through the mesh.
Choosing the Best Flour Sifter
What to look for when buying.
Material Matters
Stainless steel lasts longest. It won’t rust or break. Look for quality construction with tight welds.
Plastic is lighter and cheaper. But it cracks over time.
Size Considerations
A 3-cup capacity works for most home baking. Smaller sizes are fine for occasional use. Larger ones suit frequent bakers.
I have a 5-cup sifter for holiday baking. My everyday sifter holds 3 cups.
Mesh Fineness
The mesh should be fine enough to catch lumps. But not so fine that sifting takes forever.
Most standard sifters have the right mesh size. Very fine mesh is only needed for special applications.
Handle Comfort
Test the handle if possible. It should feel comfortable in your hand. Squeeze-handle sifters need smooth action.
Uncomfortable handles cause hand fatigue. This matters if you bake often.
Easy Cleaning
Simple designs clean easier. Fewer parts mean fewer places for flour to hide.
Avoid sifters with complex mechanisms. They’re harder to maintain.
Caring for Your Flour Sifter
Proper care extends its life.
After Each Use
Tap out all flour over the sink or trash. Turn it upside down and tap firmly.
Use a dry pastry brush on stubborn bits. Brush the mesh from both sides.
Deep Cleaning
Once a month, use compressed air to blow out trapped flour. Hold the sifter outside or over a trash can.
A dry toothbrush works too. Brush gently to avoid damaging the mesh.
Dealing with Sticky Ingredients
If you sift powdered sugar or sticky substances, some residue may remain.
Wipe with a barely damp cloth. Dry immediately with a towel. Then let it air dry completely before storing.
Storage Tips
Store in a dry drawer or cabinet. Don’t stack heavy items on top. This can bend the mesh or handle.
I keep mine in a drawer with parchment paper underneath. This catches any flour that shakes loose.
When to Replace
Replace your sifter if:
- The mesh tears or develops holes
- The handle breaks or becomes loose
- Rust appears on metal parts
- The mechanism stops working smoothly
A good sifter lasts for years. I’ve had my main one for over a decade.
Sifting for Different Baked Goods
How sifting changes by recipe.
Cakes
Always sift flour for cakes. Cakes need light, airy texture. Dense flour creates heavy cakes.
For angel food and chiffon cakes, sift 3 times. These delicate cakes need extremely fine flour.
Cookies
Most cookie recipes don’t require sifting. Cookies are meant to be denser.
But if your recipe calls for cake flour, sift it. This creates tender, melt-in-your-mouth cookies.
Bread
Bread flour rarely needs sifting. Bread benefits from gluten development. Sifting can actually make bread too tender.
Pastries
Pie crusts and pastries benefit from sifted flour. This creates flaky layers.
Sift the flour before cutting in the butter or shortening.
Muffins and Quick Breads
These are flexible. Sifting creates lighter muffins. But you can skip it for rustic, hearty versions.
I sift for blueberry muffins. I don’t sift for bran muffins.
Troubleshooting Common Issues
Solutions to problems.
Flour Won’t Flow Through
Problem: Flour gets stuck in the mesh.
Solution: Don’t overfill. Make sure flour is dry. Check for mesh damage.
Lumps Still Present After Sifting
Problem: Lumps pass through the mesh.
Solution: Your flour might be old or too wet. Try sifting twice. Check mesh for holes.
Sifter Handle Sticks
Problem: The mechanism doesn’t move smoothly.
Solution: Flour buildup causes this. Clean thoroughly with a dry brush. Check for bent parts.
Flour Dust Everywhere
Problem: Flour clouds up when sifting.
Solution: Hold the sifter closer to the bowl. Sift more slowly. Work in a draft-free area.
Rust on Metal Sifter
Problem: Orange spots appear on stainless steel.
Solution: This happens from moisture exposure. Dry it completely after any contact with liquid. If rust is light, scrub with baking soda. Heavy rust means replacement time.
FAQ
Do I really need to sift flour?
Yes, for most baking. Sifting removes lumps and adds air. This creates lighter, better-textured baked goods. Some simple recipes let you skip it. But cakes and pastries always need sifted flour.
Can I use a strainer instead of a sifter?
Yes, a fine-mesh strainer works well. Place it over a bowl. Add flour and tap the side. It takes longer than a sifter but gives similar results.
How many times should I sift flour?
Most recipes need one sift. Delicate cakes like angel food need two or three sifts. Follow your recipe’s instructions.
Should I sift flour before or after measuring?
This depends on the recipe wording. “1 cup flour, sifted” means measure first, then sift. “1 cup sifted flour” means sift first, then measure. The order changes the amount of flour you use.
How do I clean a flour sifter?
Never use water. Tap out excess flour. Use a dry brush for stuck bits. If needed, use compressed air. Water and flour make paste that clogs the mesh.
What’s the difference between a sifter and a strainer?
A sifter has a built-in mechanism to push ingredients through. A strainer requires tapping or shaking. Both work. Sifters are faster and easier.
Can I sift other ingredients besides flour?
Yes. Sift powdered sugar, cocoa powder, and any dry ingredient that clumps. You can sift multiple dry ingredients together to mix them evenly.
Why does my sifted flour measure less than unsifted?
Sifted flour is lighter and airier. It takes up more space per weight. A cup of sifted flour weighs less than a cup of unsifted flour. This is why the order of sifting and measuring matters.
Is a hand-crank or squeeze-handle sifter better?
Both work well. Squeeze-handle sifters are faster and work one-handed. Hand-crank sifters give you more control and work better for large batches. Choose based on your preference.
How long does a flour sifter last?
A quality stainless steel sifter can last decades with proper care. Keep it dry, clean it after use, and store it properly. Plastic sifters last 3-5 years typically.
Conclusion
Using a flour sifter correctly is simple. It takes just a few extra minutes. But those minutes transform your baked goods.
Remember the key points:
- Choose a quality sifter in stainless steel
- Fill it only three-quarters full
- Use steady, even motions
- Pay attention to measuring order
- Keep your sifter clean and dry
I’ve seen the difference in my own kitchen. Sifted flour makes cakes that rise higher. Cookies come out more tender. Pastries turn flakier.
Start sifting today. Your baking will improve immediately.
Try it with your next recipe. Notice how much lighter your batter looks. Taste the difference in the final product.
Once you experience properly sifted flour, you’ll never skip this step again.
Happy baking!