Why Cleaning Your Blender Matters
You made a smoothie. Now what?
Most people rinse the blender jar and move on. But that quick rinse is not enough. Food particles cling to the blade assembly, hide under the gasket seal, and stick to the walls of the blender container. These particles break down over time and grow bacteria.
A 2013 study by NSF International found that the blender gasket ranked fourth among the germiest household items dirtier than a bathroom light switch. That fact alone is a strong reason to take blender hygiene seriously.
Here is what happens when you skip a proper wash:
- Mold and mildew form inside the jar and lid
- Old food odors transfer to new blends
- Bacteria like Salmonella and E. coli can grow near the blades
- Dried-on residue dulls the stainless steel blades over time
- The rubber gasket breaks down from trapped food acids
Washing your blender the right way takes under two minutes. It keeps your appliance safe, fresh, and working well for years.
Pro TipAlways wash or at least rinse your blender right after use. Dried food is ten times harder to remove than fresh residue.
What You Need Before You Start
You do not need special products to clean a blender. Most items are already in your kitchen.
Basic Supplies
- Dish soap (a few drops)
- Warm water
- A soft sponge or bottle brush
- White vinegar (for odors and stains)
- Baking soda (for tough residue)
- Lemon juice or lemon wedge (optional, natural deodorizer)
- A clean dish towel or drying rack
Safety FirstNever put your hand inside the blender jar to scrub the blades. Blender blades are razor-sharp. Always use a long-handled brush or let the self-clean method do the work.
The Self-Cleaning Method (Quickest Way)
This is the fastest way to clean a blender. It works for daily use after making smoothies, soups, sauces, or shakes. Most high-powered blenders including Vitamix, Blendtec, and Ninja support this method.
Step-by-Step: Self-Clean
- Rinse the blender jar right after use to remove loose food.
- Fill the jar halfway with warm water. Do not use hot water on a cold jar it can crack the glass.
- Add two to three drops of dish soap.
- Secure the lid tightly. Hold it down with one hand.
- Run the blender on high for 30 to 60 seconds.
- Pour out the soapy water.
- Rinse the jar twice with clean water.
- Place upside down on a drying rack to air dry.
When to Use This MethodUse the self-clean method for light, everyday cleaning. For dairy, raw meat residue, or stuck-on food, move to a full hand wash.
How to Hand-Wash a Blender Properly
A full hand wash is the most thorough method. Do this at least once a week, or any time you blend sticky, thick, or protein-rich foods.
Step 1: Unplug the Blender
Always unplug the motor base before you start. This is the most important safety step. Never clean a blender that is still connected to power.
Step 2: Disassemble the Parts
Take apart the blender carefully. Most blenders have four key parts:
- The jar glass, plastic, or BPA-free Tritan copolyester
- The lid and lid cap
- The blade assembly blades, coupling, and gasket ring
- The motor base
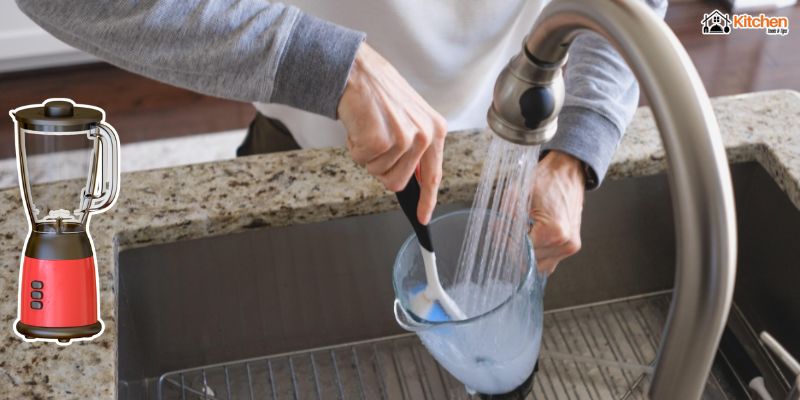
Twist the blade assembly off the bottom of the jar. Pull off the gasket seal. These hidden parts collect the most food buildup.
Step 3: Wash the Jar
Fill your sink with warm, soapy water. Submerge the jar and scrub the inside with a bottle brush. Pay attention to the bottom corners where food collects.
Rinse well. Soap residue can affect the taste of your next blend.
Step 4: Clean the Lid and Lid Cap
Wash the lid and its removable cap under running water. The vented cap often traps dried liquid inside its grooves. Use a small brush or toothpick to clear those spots.
Step 5: Handle the Blade Assembly with Care
This is the trickiest part. The blade assembly holds the blades, the drive socket coupling, and the silicone or rubber gasket.
- Hold the assembly by its base never by the blades
- Use a brush to scrub around the blade edges
- Remove and wash the gasket separately food acids degrade it if left dirty
- Check for cracks in the gasket; a damaged gasket can leak
Watch OutDo not soak the blade assembly for long periods. Water can work into the bearing and cause it to rust or seize.
Step 6: Wipe Down the Motor Base
Never submerge the motor base in water. The motor and electrical components are inside.
Instead, dampen a soft cloth and wipe the outside of the base. Use a dry toothbrush to clean around the drive socket. Dry it thoroughly before use.
Step 7: Dry and Reassemble
Air dry all parts on a clean rack before reassembling. Trapped moisture promotes mold growth. If you are in a hurry, use a clean towel to dry each part by hand.
Can You Put a Blender in the Dishwasher?
Yes but only certain parts.
Here is a quick guide:
| Blender Part | Dishwasher Safe? | Notes |
|---|---|---|
| Glass jar | ✅ Usually yes | Top rack only. Check your manual. |
| Plastic jar (BPA-free Tritan) | ✅ Often yes | Top rack. High heat can cloud plastic over time. |
| Lid and lid cap | ✅ Yes | Top rack, open facing down. |
| Blade assembly | ⚠️ Check manual | Some brands allow it; heat can dull blades. |
| Rubber gasket | ✅ Yes | Top rack. Inspect for wear after each wash. |
| Motor base | ❌ Never | Wipe only. Water will damage the motor. |
Even when parts are dishwasher-safe, hand washing extends their lifespan. Harsh detergents and high heat cycles can fog plastic jars, corrode blade edges, and crack the gasket ring faster than gentle handwashing does.
How to Remove Stubborn Stains and Odors
Some blends leave behind more than a simple rinse can handle. Turmeric, beet, carrot, and berry smoothies can stain plastic jars. Garlic, fish, and aged protein powders leave strong odors.
Here are three proven natural methods:
Baking Soda Paste
Mix baking soda with a little water into a paste. Apply to stained areas. Let sit for 10 minutes. Scrub and rinse. Great for protein powder stains and discoloration.
White Vinegar Soak
Fill the jar with equal parts water and distilled white vinegar. Let soak for 15 minutes. Run on low for 30 seconds. Rinse well. Best for odor removal.
Lemon Juice Trick
Add the juice of one lemon and warm water to the jar. Blend for 30 seconds. The citric acid breaks down residue and leaves the jar smelling fresh.
For Turmeric and Berry Stains
These stains need a bit more work. Try this combination approach:
- Make a thick paste with baking soda and a few drops of dish soap.
- Apply the paste to the stained areas inside the jar.
- Let it sit for 15 to 20 minutes.
- Scrub with a soft sponge not steel wool, which scratches plastic.
- Rinse and check. Repeat if the stain remains.
Prevent Stains Before They SetRinse the blender immediately after blending colorful foods like turmeric, carrots, or beets. Stains set in under 10 minutes on plastic surfaces.
Cleaning Special Blender Types
How to Clean a Vitamix Blender
Vitamix recommends its own self-cleaning method. Add warm water and one drop of dish soap. Run on the highest setting for 60 seconds using the self-cleaning program. Rinse and air dry. Do not put Vitamix containers in the dishwasher heat warps the BPA-free Eastman Tritan copolyester over time.
How to Clean a Ninja Blender
Many Ninja blender cups and lids are dishwasher-safe on the top rack. The blade assembly varies by model check your manual. Ninja’s Auto-iQ models have stackable cups that rinse quickly. Always check that the blade gasket is clean after each use.
How to Clean a NutriBullet
NutriBullet cups are top-rack dishwasher-safe. However, the blade assembly should be hand-washed only. Do not soak the blade in water. Rinse immediately after use. The NutriBullet motor base should be wiped with a damp cloth, never immersed.
How to Clean an Immersion Blender
An immersion blender — also called a stick blender or hand blender is easier to clean than a countertop model. Most immersion blender shafts detach from the motor unit. Here is how to clean one:
- Detach the blending shaft from the motor handle.
- Submerge the shaft in a cup of warm soapy water.
- Run it briefly to let the blades spin and self-clean.
- Rinse under running water.
- Wipe the motor handle with a damp cloth never submerge it.
- Air dry before reattaching and storing.
How Often Should You Wash a Blender?
The answer is simple: every single time you use it.
Even a quick rinse right after use is better than leaving food to dry. Here is a simple cleaning schedule:
| Frequency | Task |
|---|---|
| After every use | Self-clean cycle or quick rinse with soapy water |
| Once a week | Full hand wash with blade disassembly and gasket cleaning |
| Once a month | Deep clean with baking soda or vinegar to remove buildup and odors |
| Every 3 months | Inspect the gasket for cracks and replace it if needed |
Tips to Keep Your Blender Clean Longer
A few small habits make a big difference in how fast your blender gets dirty — and how easy it is to clean.
- Rinse right away. The moment you pour out your smoothie, add water to the jar. Food residue comes off in seconds when it is still wet.
- Do not overfill. Overfilling causes leaks around the blade assembly. Leaked food hardens and is difficult to remove.
- Use cold water for dairy. Hot water can cook milk proteins onto the plastic, making them sticky. Always rinse dairy blends with cold water first.
- Store with the lid off. Storing your blender with the lid on traps moisture and encourages mold. Let it air out between uses.
- Replace the gasket annually. A worn gasket leaks and traps food. Replacement seals are inexpensive and sold for most major brands.
- Blend water before food. Adding liquid to the jar before dry ingredients helps prevent powders from caking around the blades.
Frequently Asked Questions
Can I wash my blender with just water?
Water alone does not remove oils, proteins, or bacteria effectively. Always use a small amount of dish soap with warm water. For light use, the self-clean method with soap and water is enough. For heavier blends, a full hand wash is better.
Is it safe to put blender blades in the dishwasher?
Some brands allow it, but it is not ideal. Dishwasher heat and harsh detergents can dull stainless steel blades and degrade the rubber gasket. Hand washing the blade assembly keeps it in better condition for longer.
How do I get the sour smell out of my blender?
A sour smell usually means bacteria or mold has grown in the gasket seal or blade assembly. Disassemble the blender fully. Soak all parts (except the motor base) in a mixture of equal parts water and white vinegar for 15 minutes. Wash, rinse, and allow to air dry completely before reassembling.
Can I use bleach to clean my blender?
Bleach is not recommended for regular blender cleaning. It can degrade plastic and rubber parts and leave harmful residue. Dish soap, baking soda, and white vinegar are safe, effective, and food-friendly alternatives.
How do I remove a turmeric stain from a plastic blender jar?
Apply a paste of baking soda and dish soap directly to the stain. Let it sit for 15 to 20 minutes, then scrub with a soft sponge. Sunlight also helps — placing the rinsed jar in direct sunlight for an hour naturally fades turmeric stains through UV exposure.
What is the fastest way to clean a blender?
The self-clean method is the fastest. Add warm water and two drops of dish soap to the jar, blend on high for 30 to 60 seconds, then rinse twice. It takes under two minutes and works well for everyday smoothie and liquid blends.
Do I need to clean the blender after every use?
Yes. Even after blending water or light drinks, residue can remain near the blades and gasket. At minimum, give it a quick rinse. A proper wash — even the self-clean method — after every use prevents buildup, bacteria growth, and lingering odors.
How do I clean the blender motor base?
Never submerge or run the motor base under water. Unplug it first. Use a damp cloth to wipe the outside surfaces. For sticky spots near the drive socket, use a dry toothbrush. Dry thoroughly before plugging back in.
Quick Summary: How to Wash a Blender
- Rinse or self-clean your blender after every single use
- Use warm water and dish soap for daily cleaning
- Disassemble the blade assembly and gasket for a weekly deep wash
- Never submerge the motor base wipe it with a damp cloth only
- Use baking soda, white vinegar, or lemon juice to remove stains and odors
- Check and replace the rubber gasket seal every few months
- Air dry all parts before reassembling and storing