Cooking food to the right temperature keeps your family safe and makes meals taste better. A kitchen thermometer takes the guesswork out of cooking. This guide shows you exactly how to use one properly.
Why Kitchen Thermometers Matter
Food thermometers help you avoid foodborne illness. Harmful bacteria like Salmonella and E. coli die at specific temperatures. You can’t tell if food is safe just by looking at it.
A thermometer also prevents overcooking. Your chicken stays juicy. Your steak reaches perfect medium-rare. Your bread bakes through without burning.
The USDA recommends using food thermometers for all meat, poultry, and seafood dishes.
Types of Kitchen Thermometers
Instant-Read Thermometers
These digital thermometers give readings in 2-5 seconds. You insert them near the end of cooking. They work for most foods.
Dial Thermometers
These analog models take 15-20 seconds to show temperature. They’re affordable but slower than digital versions.
Oven-Safe Thermometers
You leave these in food while it cooks. They’re perfect for roasts and large cuts of meat.
Infrared Thermometers
These measure surface temperature without touching food. They work well for griddles and oil but not for checking internal doneness.
How to Use a Kitchen Thermometer: Step-by-Step
Step 1: Know Your Thermometer
Read the instruction manual. Learn if your model needs calibration. Check if it’s waterproof.
Step 2: Wait for the Right Time
For instant-read models, check temperature near the end of cooking time. Don’t leave them in the oven.
For oven-safe models, insert before cooking starts.
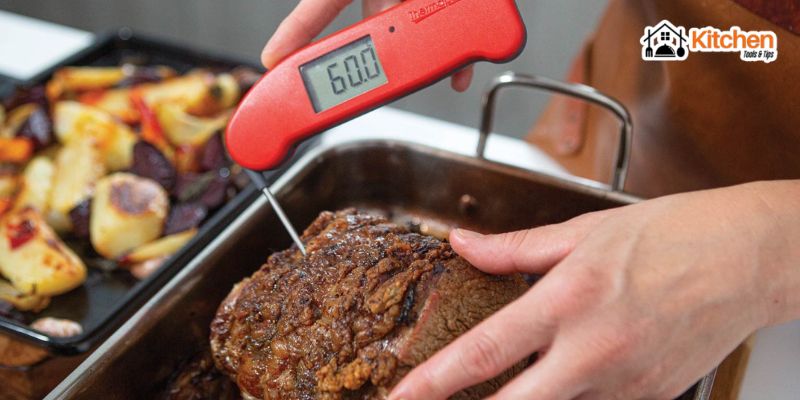
Step 3: Insert Properly
Push the probe into the thickest part of the food. Avoid bones, fat, and gristle. These give false readings.
The tip of the probe should reach the center of the food.
Step 4: Wait for the Reading
Digital thermometers beep when ready. Dial models need 15-20 seconds.
Keep the probe still while waiting.
Step 5: Check the Temperature
Compare your reading to safe temperature guidelines. If it’s too low, keep cooking.
Step 6: Clean Immediately
Wash the probe with hot soapy water after each use. This prevents cross-contamination.
Where to Insert the Thermometer
Whole Chicken or Turkey
Insert into the thickest part of the thigh. Avoid touching the bone. The thigh is the last part to reach a safe temperature.
Chicken Breasts
Push the probe into the thickest part from the side. Go parallel to the cutting board.
Beef Roasts
Insert into the center of the thickest part. Keep away from fat and bone.
Steaks and Chops
Insert from the side, going into the center. This works better than top-down insertion.
Ground Meat
Check the thickest part of burgers or meatloaf. Ground meat needs higher temperatures than whole cuts.
Fish
Insert into the thickest part. Fish should flake easily when done.
Casseroles
Check the center where food heats slowest.
Safe Internal Temperatures for Different Foods
Follow these USDA-recommended temperatures:
- Poultry (chicken, turkey, duck): 165°F (74°C)
- Ground meats (beef, pork, lamb): 160°F (71°C)
- Ground poultry: 165°F (74°C)
- Beef, pork, lamb steaks and roasts: 145°F (63°C) plus 3-minute rest
- Fish and shellfish: 145°F (63°C)
- Eggs: 160°F (71°C)
- Leftovers and casseroles: 165°F (74°C)
Let meat rest for 3 minutes after reaching temperature. The temperature continues to rise slightly.
Common Mistakes to Avoid
Taking Temperature Too Early
Wait until near the end of your recipe’s cooking time. Repeated opening releases heat and extends cooking.
Touching Bone or Pan
Bones conduct heat differently than meat. Pans are much hotter. Both give wrong readings.
Not Going Deep Enough
Surface temperature doesn’t show if the inside is safe. Push into the center.
Using a Broken Thermometer
Test accuracy in ice water (should read 32°F) or boiling water (should read 212°F at sea level).
Forgetting to Clean
Dirty thermometers spread bacteria. Clean between different foods.
Checking Only One Spot
Large items may have cool spots. Check multiple locations.
Cleaning and Maintenance Tips
Wash the metal probe with hot soapy water after every use. Never submerge digital displays in water unless labeled waterproof.
Sanitize with a mixture of one tablespoon bleach per gallon of water. Let it air dry.
Store in a protective case to prevent damage.
Test accuracy monthly using the ice water method. Fill a glass with ice and water, stir, and insert the probe. It should read 32°F (0°C).
Replace batteries annually in digital models.
Conclusion
Using a kitchen thermometer properly protects your health and improves your cooking. Insert it into the thickest part, avoid bones, and check against safe temperature guidelines.
A good food thermometer costs less than twenty dollars. It’s one of the most important tools in your kitchen.
Start using one today. Your food will be safer, tastier, and cooked exactly right every time