Why Parchment Paper Changes Everything
You pull your cake out of the oven.
It sticks to the pan. Half of it tears when you try to remove it.
This is one of the most common baking problems. And it is almost always avoidable.
Parchment paper is one of the most useful tools in any kitchen. It stops baked goods from sticking. It makes cleanup fast. It protects your pans. It helps food bake more evenly.
Most people only use it to line a baking sheet. But there is so much more you can do with it.
This guide covers everything. How to cut parchment for every pan shape. How to use it in an air fryer. How to get perfect results when baking cake and bread. And pro tips that most home bakers never learn.
Let us get started.
What Parchment Paper Is and How It Works
Parchment paper is a cellulose-based paper treated with silicone. This treatment gives it two key properties.
It is heat-resistant. And it is non-stick.
Most parchment paper is safe in an oven up to 425°F or 218°C. Some high-heat types handle up to 450°F or 230°C. Always check the packaging before use.
The silicone coating is what creates the non-stick surface. Batter, dough, cheese, and sugar all release cleanly from it.
One important warning:
Parchment paper is not the same as wax paper. Wax paper has a paraffin wax coating. It is not oven-safe. Using wax paper in your oven can cause smoking and is a fire hazard.
Always check which paper you are reaching for before you start baking.
Parchment Paper vs Foil
Parchment and foil are not the same. Each has different strengths. Knowing which one to use saves you time and protects your baked goods.
Use parchment paper for:
- Lining a baking sheet for cookies or vegetables
- Baking cake in a round cake pan or square pan
- Bread baking where dough needs a clean, non-stick surface
- Lining an air fryer basket
- Any task where you need non-stick without greasing
Use foil for:
- Covering food to hold in moisture during cooking
- Wrapping food for storage
- High-heat grilling
- Creating a tent over roasted meat
The key difference is simple. Foil is not non-stick unless you grease it. Parchment does not need greasing at all.
For almost all baking tasks, parchment is the smarter and safer choice.
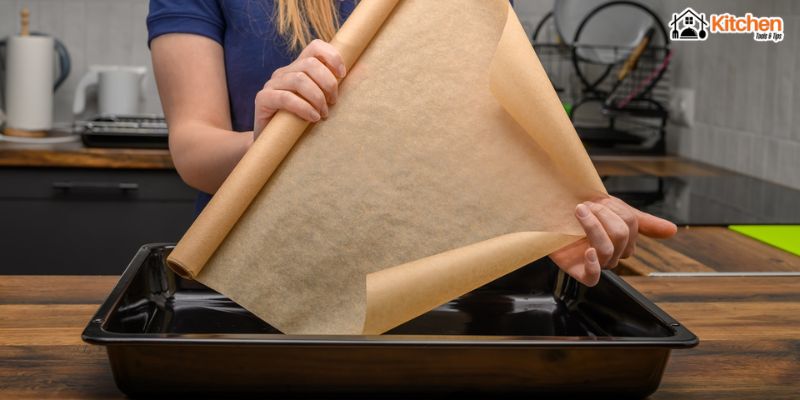
How to Cut Parchment for Every Pan Shape
Learning to cut parchment correctly saves time and gives you clean results every time.
For a Rectangular Baking Sheet or Baking Pan
Tear off a sheet slightly larger than your pan. Place the pan on the paper. Trace loosely around the base. Cut along that line.
Or simply lay the sheet across the pan and let the edges run up the sides. This works well for bars and brownies where you want the paper to hang over for easy lifting.
For a Round Cake Pan
This takes one extra step. Here is the easiest method.
Place your round cake pan on a sheet of parchment. Trace around the base with a pencil. Cut just inside the line. The circle fits snugly inside the base.
Or use the fold-and-cut method. Fold the parchment in half. Fold it again. Then fold it into a triangle. Hold the pointed tip over the center of the pan. Trim the wide end to match the pan radius. Unfold. You have a perfect circle.
For a Square Pan
Lay parchment over your square pan. Press it into the base and corners. Cut a small diagonal slit at each corner. This lets the paper fold neatly into the corners with no bunching or thick folds.
Press the paper back in. The base sits flat. The walls are clean and even.
For a Deep Cake Tin
A deep cake tin needs two pieces. One circle for the base and one long strip for the sides.
Cut the base circle first. Then cut a strip as tall as the tin walls. Wrap the strip around the inside. Fit the circle into the base on top of the strip ends. Grease the tin lightly first to keep the paper in place.
How to Line a Round Cake Pan
Lining a round cake pan correctly is one of the most important steps in baking cake. A badly lined pan tears your cake. A well-lined pan gives a clean, perfect release every time.
Step 1: Grease the inside base and walls of the pan with butter or cooking spray. This holds the parchment flat.
Step 2: Cut your parchment circle using one of the methods above.
Step 3: Press the circle into the greased base. It should lie completely flat with no lifted edges.
Step 4: For extra protection, grease the top of the parchment circle lightly.
Step 5: Pour in your batter and bake as normal.
When your cake comes out, run a knife around the outside edge. Flip the pan. The cake releases cleanly. Peel the parchment away. Done.
This method works for every type of baking cake. Sponge cakes, chocolate cakes, cheesecake bases, and layered cakes all come out better with a properly lined round cake pan.
How to Line a Square Pan
A square pan has corners that cause bunching if you do not cut the paper correctly.
Step 1: Cut a sheet of parchment wider and longer than your square pan. It should extend a few inches beyond each side.
Step 2: Press the parchment down into the base and against all four walls. The paper will bunch at the corners.
Step 3: Pull the parchment back out. At each corner, cut a diagonal slit inward. Cut just far enough that the flaps will overlap neatly when pressed back in.
Step 4: Press the paper back into the square pan. The base is flat. The walls lie smooth. The corners are clean.
Step 5: Let the edges hang over the sides. These become handles. After baking, lift the entire batch out in one clean move. This works brilliantly for brownies, bars, and blondies.
How to Line a Cake Tin
A deep cake tin needs full coverage on both the base and the walls.
Step 1: Grease the inside of the cake tin lightly. This helps the parchment stick.
Step 2: Cut a parchment circle for the base.
Step 3: Cut a long strip as tall as the walls of the tin. Add a little extra height if your baked goods rise significantly.
Step 4: Press the side strip against the greased walls. Place the base circle on top of the strip ends at the bottom.
Step 5: Press everything flat. Your cake tin is fully lined and ready for batter.
How to Use Parchment on a Baking Sheet
A baking sheet lined with parchment is the foundation of clean, easy baking. Here is how to get the most from it.
For cookies: Lay parchment flat on your baking sheet. Space cookies evenly. The paper ensures even browning on the bottom and clean, easy removal after baking.
For vegetables: Parchment stops vegetables from sticking and makes cleanup almost instant. Spread them in a single layer on the lined sheet for best results.
For reuse between batches: One sheet of parchment can handle several batches of cookies in one session. Remove the baked batch, let the paper cool, and add the next round.
For delicate baked goods: Meringues, macarons, and tuiles need parchment to release without breaking. Never put these on a bare metal baking sheet.
To anchor the paper: Place a small dab of butter under each corner of the parchment. This stops it from curling up during baking.
How to Use Parchment in a Baking Pan
For a loaf-shaped baking pan, cut a strip wide enough to cover the base and both long sides with overhangs. Press it in. Add a shorter strip to cover the short ends.
This creates a full sling. After baking and cooling, lift the whole loaf or cake straight out of the pan cleanly.
For brownie baking pans, use the same overhang method on all four sides. After baking, lift the whole batch out in one piece. Cut on a board without struggling to remove pieces from the pan.
Always press parchment firmly into the corners of a baking pan before adding batter. Air pockets under the paper can create uneven bases on your baked goods.
How to Use Parchment in an Air Fryer
Parchment works well in an air fryer. But you must follow a few important rules.
Never put parchment in an empty air fryer. The fan is powerful. Empty parchment will be lifted by the airflow and can touch the heating element. This is a fire hazard. Always place food on the parchment before turning the air fryer on.
Use perforated parchment. Perforated parchment has small holes that let hot air flow freely. Regular parchment blocks airflow and reduces the crispiness that makes air fryer cooking work well. Buy pre-cut perforated rounds or punch your own holes with a skewer.
Cut the parchment to fit. The paper should cover the basket base without curling up the sides too high. Excess paper around the edges blocks airflow.
Check your temperature limit. Most parchment is safe to 425°F or 218°C. Air fryers heat up quickly and can exceed this. Check your model and match it to your parchment’s heat rating.
Parchment in the air fryer is perfect for fish, dumplings, reheated baked goods, and sticky sauced foods.
Tips for Baking Bread With Parchment
Parchment paper changes how you bake bread. These tips make a real difference.
Use it as a transfer tool. Shape your dough directly on a sheet of parchment. When your Dutch oven or baking stone is hot and ready, lift the dough by the parchment and lower it in. This is safe and clean.
Score the dough on the parchment. Score your shaped loaf while it sits on the parchment. The dough holds its shape during the transfer to the oven.
Leave it in for the first half of baking. The parchment protects the base of the bread during the steamy first phase. After 20 minutes, slide the parchment out to crisp the base.
Use it for rolls and enriched breads. For soft bread rolls, parchment on your baking sheet prevents sticking and stops the bottoms from over-browning.
Pro Tips for Using Parchment Paper
These tips separate confident bakers from frustrated ones.
Crumple it first. Scrunch the paper into a ball before lining a round cake pan or cake tin. Unfold it. The crumpled paper is softer and more flexible. It sits into curves and corners far more easily.
Use it as a piping guide. Trace shapes or write templates on parchment with a pencil. Flip it pencil-side down. Pipe your icing or chocolate directly over the lines. This is one of the best tricks in cake decorating.
Make a parchment cone. Cut a triangle of parchment. Roll it into a cone. Use it as a disposable piping bag for icing, chocolate drizzles, or fine decoration.
Separate stored baked goods. Place a sheet of parchment between layers of cookies or baked goods in a storage container. This stops them from sticking together.
Roll pastry between two sheets. Place dough between two sheets of parchment and roll it out. No sticking. No flour on the counter. The paper peels away cleanly every time.
Anchor with butter. A small dab of butter under each corner of the parchment keeps it from sliding when you pour in batter or place dough.
Common Mistakes to Avoid
Using wax paper instead of parchment. Wax paper is not safe in the oven. It smokes and can catch fire. Always check the label before use.
Placing empty parchment in an air fryer. The fan will lift it and it can reach the heating element. Always put food on the paper first.
Exceeding the temperature limit. Most parchment is safe to 425°F. Check your oven temperature with a thermometer. Many ovens run hotter than the dial shows.
Skipping the grease step on very sticky batters. For very rich or sticky cakes, add a light grease on top of the parchment circle in your round cake pan for double protection.
Not anchoring the paper. Loose parchment slides when you pour batter. Use butter under the corners to hold it in place.
Cutting parchment too small. Small parchment leaves gaps. Batter seeps through and sticks. Always cut to fully cover the base with a little extra on the sides.
FAQs
Can I reuse parchment paper? Yes. If the parchment is not burnt, torn, or soiled, you can reuse it for another batch in the same session. For cookies and dry baked goods, parchment often lasts two or three uses. Do not reuse parchment that touched raw meat or fish.
Do I need to grease parchment paper? Usually not. The silicone coating is already non-stick. For very sticky batters or rich cakes in a round cake pan, a light grease on top of the parchment adds extra protection.
Is parchment safe in an air fryer? Yes, with the right steps. Use perforated parchment. Never place it in an empty basket. Check that the heat rating matches your air fryer’s temperature.
What is the difference between bleached and unbleached parchment? Bleached parchment is white and treated with chlorine. Unbleached parchment is brown and more natural. Both are safe. Unbleached is the better choice for high-temperature baking.
Can parchment go directly on the oven rack? Yes. For pizzas and flatbreads, you can place parchment directly on the oven rack. Make sure it does not overhang near the heating elements.
How do I stop parchment from curling in the pan? Crumple it into a ball first and then unfold it. This relaxes the paper and makes it flexible. You can also anchor the corners with a small dab of butter.
Final Thoughts
Parchment paper is one of those tools that changes how you bake once you use it the right way.
It protects your baking pan and baking sheet. It gives a clean release from your round cake pan, square pan, and cake tin every time. It makes bread baking easier and safer. It even works in the air fryer when used correctly.
The tips in this guide cover every situation you will face in a home kitchen. Cut parchment the right way. Line your pans properly. Anchor the paper before adding batter. Crumple it before pressing it into curved pans.
Follow these steps and your baked goods will come out cleaner, more even, and far more impressive.
Keep a roll of parchment in your kitchen at all times.
You will never go back to baking without it.