Choosing the right vegetable peeler can save you time and effort in the kitchen. The wrong peeler makes prep work frustrating. The right one turns peeling into an easy task.
This guide shows you all the common peeler types. You’ll learn what each one does best. By the end, you’ll know exactly which peeler fits your cooking style.
Why Your Peeler Choice Matters
A good vegetable peeler does more than remove skin. It protects your fingers, reduces waste, and speeds up meal prep. Different vegetables need different tools. Soft tomatoes require a different blade than hard butternut squash.
The right peeler also lasts longer. Quality tools stay sharp for years. Cheap peelers dull quickly and waste more food.
Main Types of Vegetable Peelers
Straight Peeler (Swivel Peeler)
The straight peeler is the most common type in American kitchens. It looks like a short knife with a blade at the end.
How it works: The blade swivels as you pull it toward you. This design follows the shape of round vegetables naturally.
Best for:
- Potatoes
- Carrots
- Cucumbers
- Apples
- Any round or oval vegetables
Pros: Easy to control. Works well for right-handed and left-handed people. Takes up little drawer space.
Cons: Can tire your wrist during long peeling sessions. Not ideal for flat surfaces.
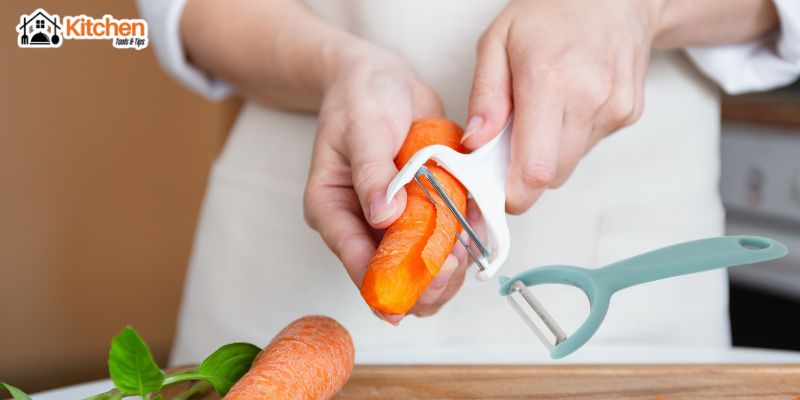
Y-Peeler (Horizontal Peeler)
The Y-peeler gets its name from its shape. The blade sits perpendicular to the handle, forming a Y.
How it works: You push the peeler away from your body. The horizontal blade covers more surface area with each stroke.
Best for:
- Large vegetables like butternut squash
- Zucchini
- Eggplant
- Melons
- Peeling in long, smooth strips
Pros: Faster than straight peelers. Less strain on your wrist. Great for making vegetable ribbons.
Cons: Takes more drawer space. Some people find the motion awkward at first.
Serrated Peeler
A serrated peeler has tiny teeth along the blade edge. These teeth grip slippery or soft-skinned produce.
How it works: The serrated edge grabs the skin without squishing the flesh underneath.
Best for:
- Tomatoes
- Peaches
- Plums
- Kiwis
- Any soft or waxy vegetables
Pros: Handles delicate produce perfectly. Works on waxed vegetables like store-bought cucumbers.
Cons: Not necessary for firm vegetables. The serrated edge can create slightly rougher cuts.
Julienne Peeler
The julienne peeler creates thin strips instead of flat peels. It has small teeth that cut vegetables into matchstick shapes.
How it works: The blade has a row of small cutting teeth. These create uniform strips as you peel.
Best for:
- Making carrot sticks for salads
- Zucchini noodles (zoodles)
- Cucumber ribbons
- Decorative vegetable garnishes
- Stir-fry prep
Pros: Creates uniform cuts quickly. Perfect for raw vegetable salads. Makes healthy pasta alternatives.
Cons: Only creates one cut style. Not suitable for regular peeling.
Electric Peeler
Electric peelers automate the peeling process. You hold the vegetable while the machine rotates and removes the skin.
How it works: A spinning blade moves around the vegetable’s surface. The machine senses pressure and adjusts automatically.
Best for:
- People with arthritis or hand pain
- Large batch cooking
- Potatoes in bulk
- Anyone who peels vegetables daily
Pros: Saves time and physical effort. Consistent results. Great for accessibility needs.
Cons: More expensive than manual peelers. Requires counter space and electrical outlet. Not portable.
How to Choose the Right Vegetable Peeler
Consider these factors when buying a peeler:
Your cooking habits: Do you peel vegetables daily or weekly? Daily cooks benefit from investing in quality tools.
Physical comfort: If you have arthritis or grip issues, choose ergonomic handles or electric models.
Storage space: Y-peelers need more room. Straight peelers fit in crowded drawers.
Common vegetables: Match the peeler to what you cook most. Mostly potatoes? Get a straight peeler. Lots of squash? Choose a Y-peeler.
Budget: Basic peelers cost $5-10. Premium models run $15-30. Electric versions start around $30.
Material quality: Stainless steel blades last longest. Plastic handles should feel sturdy, not flimsy.
Tips for Using Vegetable Peelers Safely
Stay safe while peeling with these simple tips:
Always peel away from your body. This prevents cuts if the peeler slips.
Keep blades sharp. Dull peelers require more pressure, increasing accident risk.
Use a stable cutting board. Peel over a board, not in your hand.
Watch your fingers. Keep fingertips away from the blade path.
Wash and dry immediately. This prevents rust and keeps the blade sharp longer.
Replace worn peelers. If the blade wobbles or doesn’t cut smoothly, buy a new one.
The Bottom Line
Every kitchen needs at least one good vegetable peeler. Start with a straight peeler or Y-peeler for everyday use. Add specialty peelers as your cooking skills grow.
The best peeler feels comfortable in your hand and works with your cooking style. Try different types if possible before buying. Many kitchen stores let you test displays.
Remember that even expensive peelers wear out eventually. Replace yours every few years for best results. A sharp, well-maintained peeler makes cooking easier and more enjoyable.
Choose the right tool, and vegetable prep becomes quick and simple. Your meals will thank you.